![Ideas for the Ellison All star Super Star die cutting machine.]() Wow–here it is the end of the school year, teachers and kids are EXHAUSTED and I am lucky enough to be able to host this HUGE giveaway to a very lucky, hardworking teacher–all thanks to Ellison who asked me to review their personal-sized AllStar SuperStar Die Cutting Machine and give one away to one of my readers! Make sure you read through this post all the way to the end to enter to WIN your OWN Ellison AllStar SuperStar Die Cutting Machine AND $100 in dies of your choice all sent directly to you from Ellison.
Wow–here it is the end of the school year, teachers and kids are EXHAUSTED and I am lucky enough to be able to host this HUGE giveaway to a very lucky, hardworking teacher–all thanks to Ellison who asked me to review their personal-sized AllStar SuperStar Die Cutting Machine and give one away to one of my readers! Make sure you read through this post all the way to the end to enter to WIN your OWN Ellison AllStar SuperStar Die Cutting Machine AND $100 in dies of your choice all sent directly to you from Ellison.![enter to win your own Ellision All Star Super Star machine.]()
I have been having so much fun with my new Ellison AllStar SuperStar die cutting machine that I could hardly fit all the ideas I came up with into this one post. This portable die cutting machine is like when we all were able to purchase our own laminators for our classrooms and homes. It’s so unbelievably cool that now, we, as teachers, can have our OWN die cutting machine either at home, in our classes, or as teams/grade levels at our schools. The uses of this machine are endless, educational and easy!
Check out some of the fun things I made with my new machine and read to the bottom to enter to win your OWN machine and $100 in dies of your choice. ![Ideas for the Ellison All star Super Star die cutting machine.]()
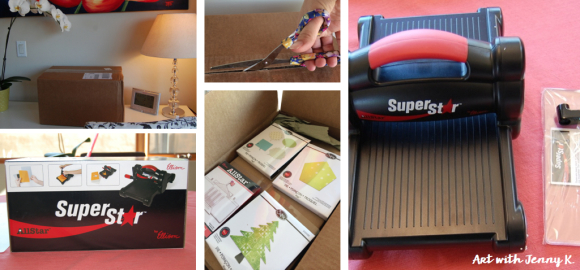
There was a lot of excitement when my box from Ellison arrived. I chose dies that would easily help infuse and integrate art into the classroom curriculum. This machine was easy to assemble (all you have to do is screw on the handle) and use.![Ideas for the Ellison All star Super Star die cutting machine.]() The pieces all sandwich together like this, plastic base on bottom, die cut on top of that (foam side up), paper on top of die cut and then plastic plate on the very top. Then you place this entire “sandwich” in the machine and crank the handle, it rolls through and comes out the other side with PERFECTLY cut shapes and designs. It’s a dream.
The pieces all sandwich together like this, plastic base on bottom, die cut on top of that (foam side up), paper on top of die cut and then plastic plate on the very top. Then you place this entire “sandwich” in the machine and crank the handle, it rolls through and comes out the other side with PERFECTLY cut shapes and designs. It’s a dream. ![Ideas for the Ellison All star Super Star die cutting machine.]()
You can cut a variety of paper (and even fabric) in about 5″ x 5″ pieces to run through your machine. The first thing I really wanted to try was using my alphabet die with some of my textured paper. If you don’t know how I create textured paper you can read about it in this blog post HERE. Caution, be sure when you print letters or numbers that you have the colored side/textured side of the paper facing down or against the foam. If not you will have backward letters and numbers.
![Ideas for the Ellison All star Super Star die cutting machine.]()
Store bought letters are fine, but children are much more interested in their class when it’s full of things they made. Use textured letters and number for your bulletin board displays or to personalize your centers/stations. ![Ideas for the Ellison All star Super Star die cutting machine.]() These letters would also be great for kids to sort, spell or create with during centers or at the start or end of any unit. I also had this idea to do with the letters…
These letters would also be great for kids to sort, spell or create with during centers or at the start or end of any unit. I also had this idea to do with the letters…![Ideas for the Ellison All star Super Star die cutting machine.]()
(and don’t forget about the negative space from the cut out…the stencil of the letters is very useful)!
![Ideas for the Ellison All star Super Star die cutting machine.]()
I had to have the White House die when I saw it. I immediately thought about how neat it would be to have kids make their own White House books when they learn about the our nation’s capital, the presidents, or any unit about government. With some simple accordion folded paper in the middle for all the content they learn from you, the kids would have a keep-sake that would make learning meaningful and fun. I made 2 styles of books.![Ideas for the Ellison All star Super Star die cutting machine.]()
The first style was an accordion folded book. For this design I cut 3 – 2″ x 10″ strips of paper and folded each in half and then glued them together, and then to the front and back “White House” cover. ![Ideas for the Ellison All star Super Star die cutting machine.]() The second design uses a simple staple to hold it all together. For this book I cut 2″ x 5″ pieces of paper (as many as you need) and then stapled them in the middle of the “White House” cover on the left side. The children would author these interactive books with the content you supply. This book idea would work for MANY of the Ellison dies available for historical events, seasons and more.
The second design uses a simple staple to hold it all together. For this book I cut 2″ x 5″ pieces of paper (as many as you need) and then stapled them in the middle of the “White House” cover on the left side. The children would author these interactive books with the content you supply. This book idea would work for MANY of the Ellison dies available for historical events, seasons and more.
![Ideas for the Ellison All star Super Star die cutting machine.]()
One thing I love to do with kids is to make things 3D–because they think it’s really cool. I love this house die cut because there are so many things you could do with it. Such as these little 3D homes that children could write in. They would also make a great bulletin board display for how kids get “home” written on each little house like this…![Ideas for the Ellison All star Super Star die cutting machine.]()
There are so many great uses for the house dies. I also wanted to play around with cutting fabric. I could see each student bringing in a piece of fabric from home and the teacher creating a unique display of each child’s fabric piece and their connection to learning about home and community. This machine cut fabric perfectly. ![Ideas for the Ellison All star Super Star die cutting machine.]()
Since the fabric was so easy to cut I decided to play with my book idea some more. I first cut out some fabric pieces with the house die cut and then I glued them to a piece of thick white paper. ![Ideas for the Ellison All star Super Star die cutting machine.]()
If you have access to Mod Podge (and a great ventilation system) you could use it or you could water down some Elmer’s glue and spread it all over the top of the fabric you’ve already glued down. Once the houses are dry, cut them out and then they make a great front and back covers to an accordion book. Children could write about many things in this book that you could easily connect to various units you already teach. ![Ideas for the Ellison All star Super Star die cutting machine.]()
![Ideas for the Ellison All star Super Star die cutting machine.]()
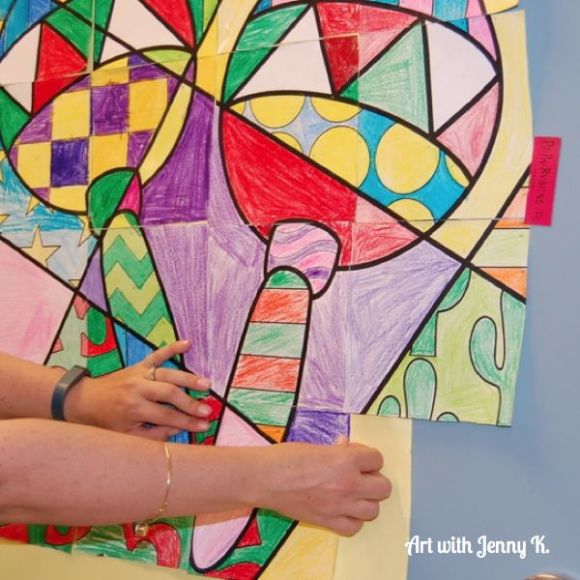
I love teaching kids about tessellations in art class and I know teachers always have this standard to address in their classrooms. There are many shape dies available with this machine and the endless creation of tessellations would be so much fun for kids. If you already had the designs cut out for them they could play around and see which shapes “do” and which shapes “do not” tesselate. Then if you took it a step or two further to create irregular tessellations, children could dive into the work of mixing shapes, like this pentagon and triangles to make more complex tessellations. One idea I had using my Pentagon Die was to have each kid create a large pentagon tessellation using the pentagon shape and a triangle (pictured as the negative space below). Kids would first glue the 6 pentagons together (as pictured below) to create a larger pentagon shape, then cut them out to reveal the larger pentagon shape (far right below).![Ideas for the Ellison All star Super Star die cutting machine.]() It would be really neat if each kid in a class created one of these shapes, and then they could tessellate their tessellations!
It would be really neat if each kid in a class created one of these shapes, and then they could tessellate their tessellations! ![]()
…and because I liked cutting fabric with my new machine I added personalized fabric pentagons to the centers of each design. This would be the start of a beautiful classroom “quilt” as a final project on tessellations or as the anticipatory set of a tessellation unit. ![]()
Still with me? I know, I told you I had a LOT of ideas. I have just a few more to share with you and then you can enter to win this machine and $100 of dies for yourself.
![Ideas for the Ellison All star Super Star die cutting machine.]()
I already showed you the 3D house up above but I also really love the 3D options for holidays. Using the Christmas Tree Die I decided to make a 3D Christmas tree that kids could decorate and use as an ornament for their trees. You could either cut them and slide them together (using two pieces per tree) or you could fold them and glue them all together (using 4 tree pieces per tree) to make ornaments like below. ![Ideas for the Ellison All star Super Star die cutting machine.]()
These techniques would apply to many of the dies available HERE.
![Ideas for the Ellison All star Super Star die cutting machine.]()
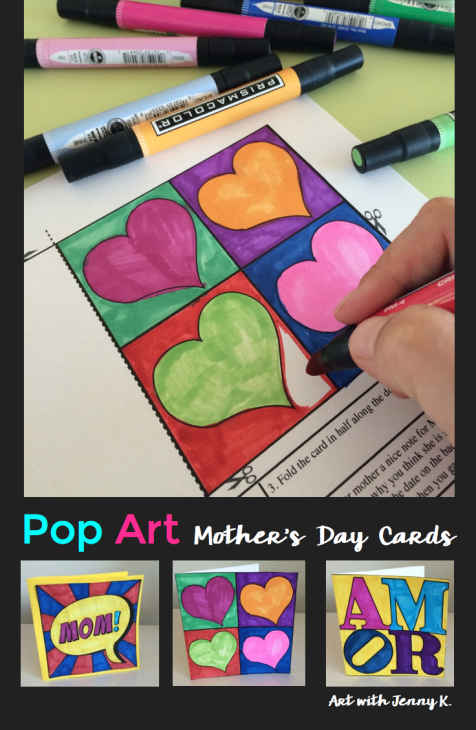
The speech bubble die was one of my favorites. As a Pop Art enthusiast I just LOVED how you could cut out four different speech bubbles with one die and then have a variety of fun with them. I also cut out black ones because I wanted the black shadow behind each bubble. ![Ideas for the Ellison All star Super Star die cutting machine.]() Kids can make thank you cards (or any kind of card) and the content can be unique to them as they write in the bubbles.
Kids can make thank you cards (or any kind of card) and the content can be unique to them as they write in the bubbles.
![Ellison giveaway images.029]() Kids love creating comics and with a simple story board template (that you can easily make like the picture on the top left) and a variety of speech bubbles, the imagination of your students will shine. Connect this to their writing and you have another meaningful way for kids to learn while having fun.
Kids love creating comics and with a simple story board template (that you can easily make like the picture on the top left) and a variety of speech bubbles, the imagination of your students will shine. Connect this to their writing and you have another meaningful way for kids to learn while having fun. ![Ideas for the Ellison All star Super Star die cutting machine.]()
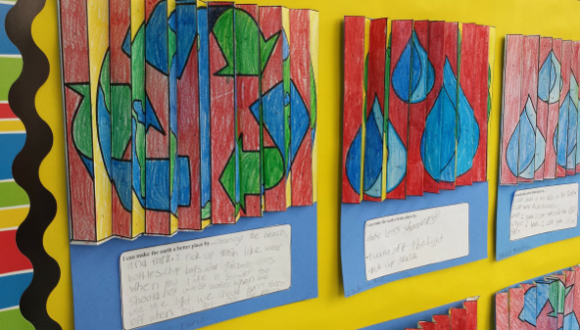
Setting goals is an important part of each classroom and I could see how you could create a wonderful bulletin board display using these speech bubbles. Print a picture of each of your students and then put it next to their “bubble,” so it looked like they were saying what they goal was for the school year–what a great visual this would be for motivation throughout the school year.
![Ideas for the Ellison All star Super Star die cutting machine.]()
And one more thing…don’t throw away the paper that you cut the pieces from!! They make great stencils!
As a teacher you probably find that stencils are very useful. I know I do. The negative space of each these dies make perfect stencils.
![Ideas for the Ellison All star Super Star die cutting machine.]()
As an art teacher I have to mention the simplicity and beauty of these shapes and colors all on their own (picture below). When I was playing with my ideas I kept thinking about how much fun it would be to provide kids with a variety of shapes in different colors and watch how they design them. It’s important that children can be the masters of their own ideas and they need time to “play” to learn and build confidence. I can’t wait to see all of the unique things kids will come up with when given the cut outs, left over stencils and scraps. I’ve witnessed it enough to know that kids will amaze us with even those simple supplies.
![Ideas for the Ellison All star Super Star die cutting machine.]()
Thank you for reading, I hope some of these ideas will spark your own imagination — teachers are a resourceful and creative group of people and this is only a small sample of things possible with this fun new teacher toy !
So without further ado…
![enter to win your own Ellision All Star Super Star machine.]()
(The winner will be announced on my blog on Friday May 15th and contacted by e-mail with instructions to claim their prize, which will be mailed directly to them)
a Rafflecopter giveaway
Thanks for reading and for entering this amazing giveaway!
Jenny K.


 Allow time for kids to process and think, some kids can jump right in with ideas and other kids take time. Sometimes kids who need time feel worried when they don’t come up with an idea right away and they’ll just copy someone so as not to look silly sitting there. Let kids work through the “design” phase with trial and error–try to be very hands-off here. Let them see what works and what doesn’t. They can use tape and glue to attach parts of the shoe. Sometimes it is helpful to use tape while designing and then go back with glue and put it all together.

 There were so many bottle tops I could have made several of these flags. The best part was that they were all different. The really little kids helped me sort the colors.
  Since this was going in an art show, I didn’t plan for it to be a permanent piece of art, although after I saw how it came out I wish I had thought of it that way. Also the structure we were attaching it to would be moved to the place where the art show was. So with those factors in play, I attached large thick black paper to the bulletin board that it was going to be displayed on and I drew with white pencil the outline of the Arizona Flag.


 I sent this lessons to some real life classroom teachers and had them test this lesson out in the classroom. Since these ladies are classroom teachers AND Teachers Pay Teachers authors they know what is needed to make a good resource. They all thought this project was very useful, easy to follow and fun for their kids–teacher (and kid) approved! Please visit them online to see all the amazing resources they have created themselves…simply click on the logos below to see what they are up to!


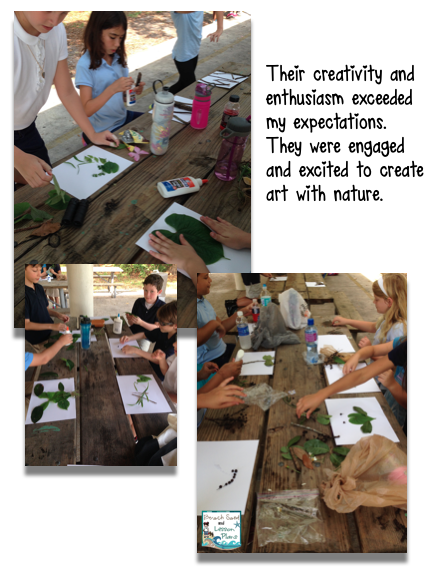
 Please welcome Erin Johnson as my Featured Teacher this month and check out the THREE GIVEAWAYS happening at the bottom of this post. When you read her guest blog post below you will know exactly why she is so great. Wait until you see all the amazing projects she did with your class recently. She’s a testament that kids love to make art in the classroom and that classroom teachers can give kids these artistic moments.
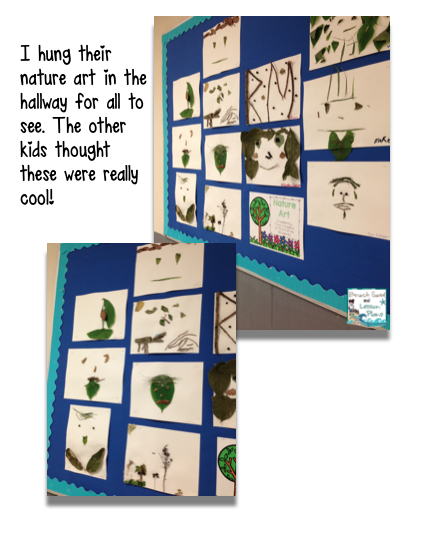
 Because it’s spring, we are featuring an abundance of seasonal art. First up, is a simple paper project that came to us via the ever-popular Pinterest. I always attempt to tie in other curricular areas with our art.


 “I made so many lines!” Peyton
 “I loved doing it.
 “I learned that it’s ok to make mistakes.” Quintin
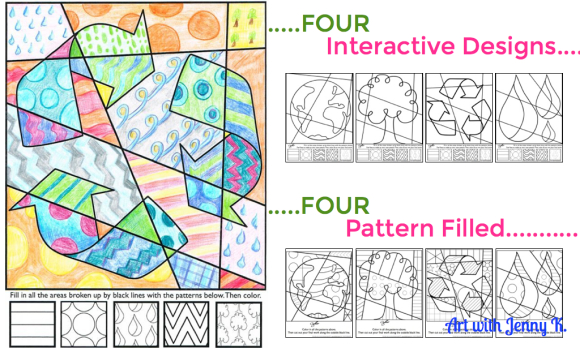
 This year I had entirely too much fun coloring my


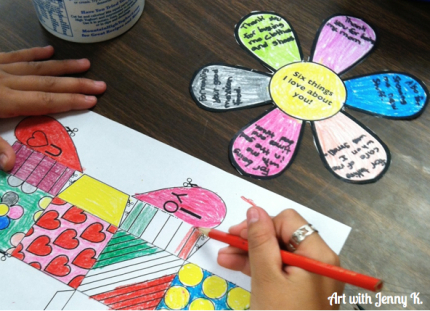
 Several years ago one of my favorite second grade teachers was retiring. So the kids and I made her really large 3D flowers to hang up at her retirement party. I found the idea on Pinterest (of course) and you can see the original flowers


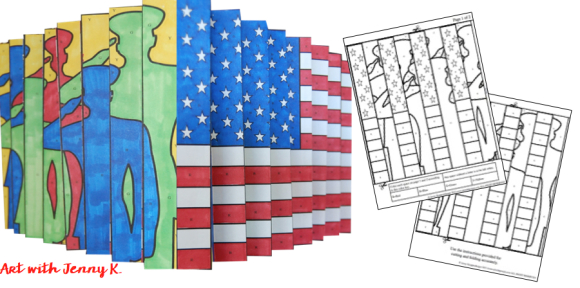
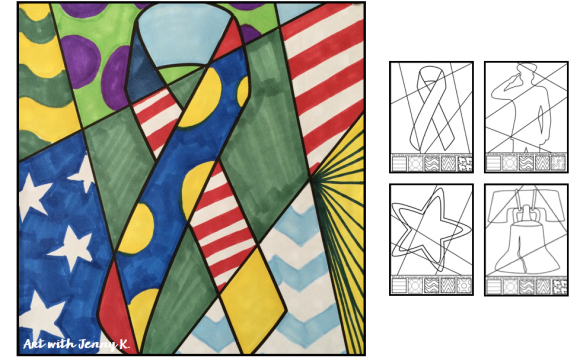
 I was so delighted when teachers responded well to this new idea of mine. I was even more excited when I heard how much the kids enjoyed the “wow” factor when the project is all put together. For the month of May, I decided to make another agamograph for Memorial Day (but this project could really be used for any patriotic holiday, such asIndependence Day or Veterans Day).


 Wow–here it is the end of the school year, teachers and kids are EXHAUSTED and I am lucky enough to be able to host this HUGE giveaway to a very lucky, hardworking teacher–all thanks to Ellison who asked me to review their personal-sized
 The pieces all sandwich together like this, plastic base on bottom, die cut on top of that (foam side up), paper on top of die cut and then plastic plate on the very top. Then you place this entire “sandwich” in the machine and crank the handle, it rolls through and comes out the other side with PERFECTLY cut shapes and designs. It’s a dream.

 These letters would also be great for kids to sort, spell or create with during centers or at the start or end of any unit. I also had this idea to do with the letters…
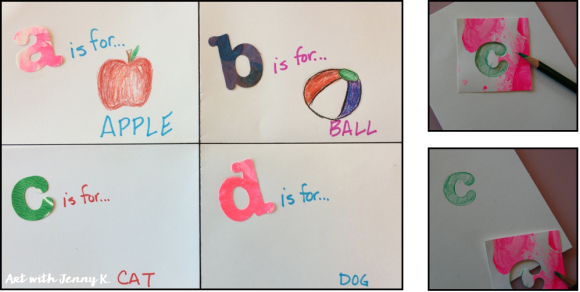


 The second design uses a simple staple to hold it all together. For this book I cut 2″ x 5″ pieces of paper (as many as you need) and then stapled them in the middle of the “White House” cover on the left side. The children would author these interactive books with the content you supply. This book idea would work for MANY of the


 It would be really neat if each kid in a class created one of these shapes, and then they could tessellate their tessellations!


 Kids can make thank you cards (or any kind of card) and the content can be unique to them as they write in the bubbles.
 Kids love creating comics and with a simple story board template (that you can easily make like the picture on the top left) and a variety of speech bubbles, the imagination of your students will shine. Connect this to their writing and you have another meaningful way for kids to learn while having fun.


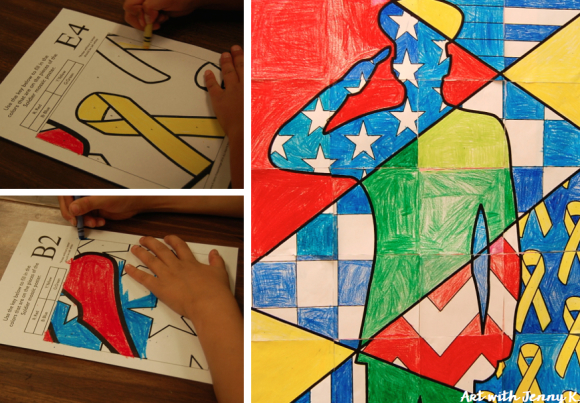
 If you have more than 20 kids in your class you could combine my soldier poster with my